
OAuth 2.0 and JWT Introduction
OAuth 2.0
OAuth 2.0 is a protocol that allows users to authorize third-parties to access their info without needing to know the user credentials. It usually relies on an additional system that acts as Identity Provider where the user is going to authenticate against, and then once authenticate you are provided with some secure piece of information with the user privileges and you can use that piece to authenticate your requests for some period.
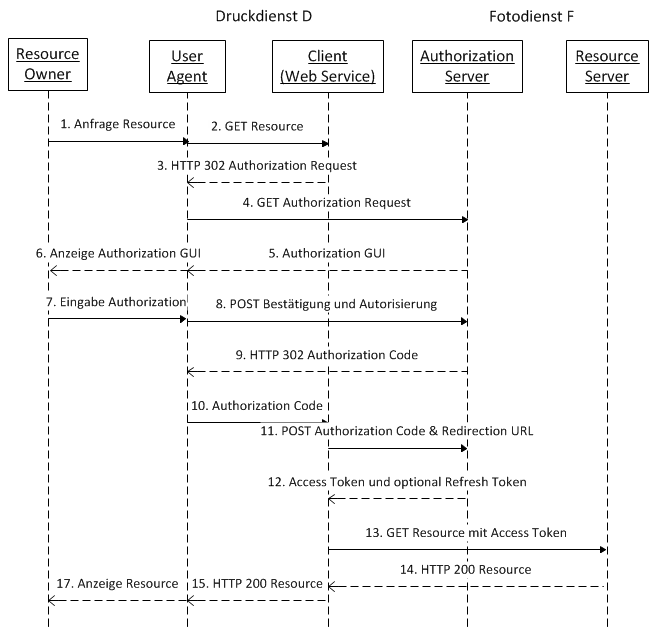
OAuth 2.0 also defines a number of grant flows to adapt to different authentication needs. These authorization grants are the following ones:
- Client Credentials
- Authorization Code
- Resource Owner Password Credentials
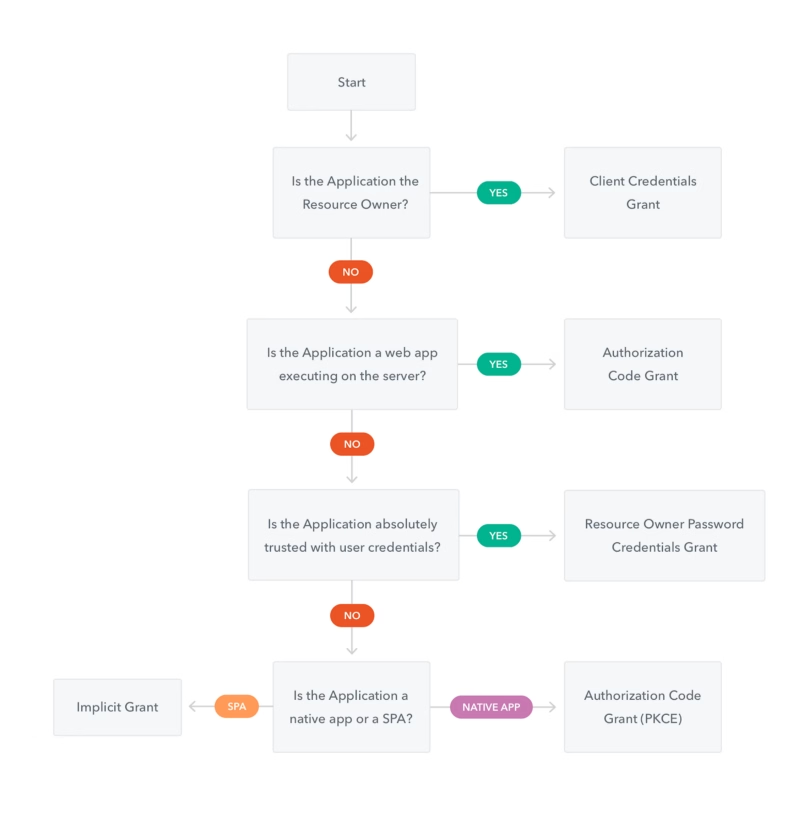
The decision to choose one flow or another depends on the needs of the invocation and of course, it is a customer personal decision but as a general way, the approximation showed in the Auth0 documentation is the usual recommendation:
These grants are based on JSON Web Token to transmit information between the different parties.
JWT
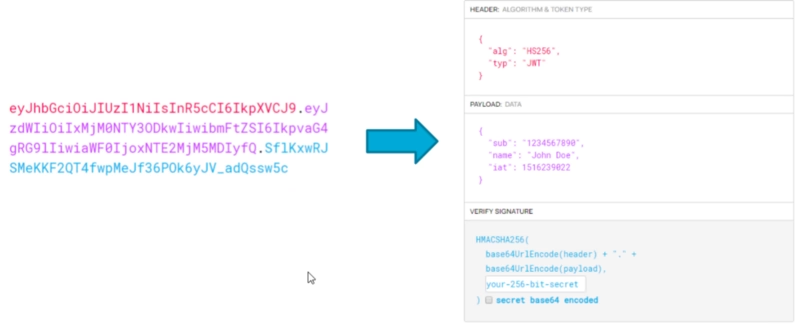
JSON Web Token is an industry standard for a token generation defined in the RFC 7519 standard. it defines a secure way to submit info between parties like a JSON object.
It is composed of three components (Header, Payload, and Signature) and can be used by a symmetric cipher or with a public/private key exchange mode using RSA or ECDSA.
Use Case Scenario
So, OAuth V2 and JWT are the usual way to authenticate requests in Microservice world, so it is important to have this standard supported in your framework, and this is perfectly covered in Flogo Enterprise as we’re going to see in this test.
AWS Cognito Setup
We’re going to use AWS Cognito as the Authorization Server, as this is quite easy to set up and it is one of the main actors in this kind of authentication. In Amazon words themselves:
Amazon Cognito lets you add user sign-up, sign-in, and access control to your web and mobile apps quickly and easily. Amazon Cognito scales to millions of users and supports sign-in with social identity providers, such as Facebook, Google, and Amazon, and enterprise identity providers via SAML 2.0.
In our case, we’re going to do a pretty straightforward setup and the steps down are shown below:
- Create a User Pool named “Flogo”
- Create an App Client with a generated secret named “TestApplication”
- Create a Resource Server named “Test” with identifier “http://flogo.test1” and with a scope named “echo”
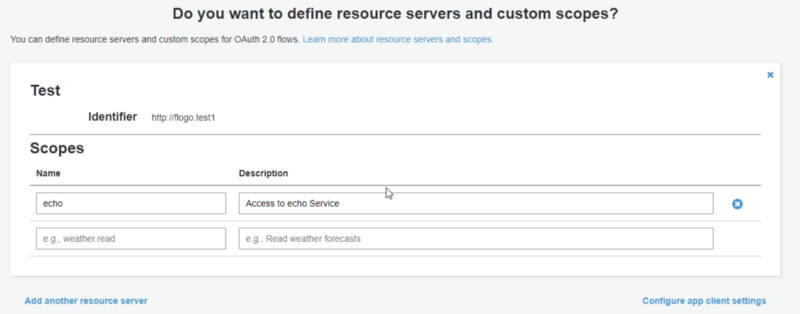
- Set the following App Client Settings as shown in the image below with the following details:
- Cognito User Pool selected as Enable Identity Provider
- Client credentials used as Allowed OAuth Flows
- http://flogo.test1/echo selected as an enabled scope
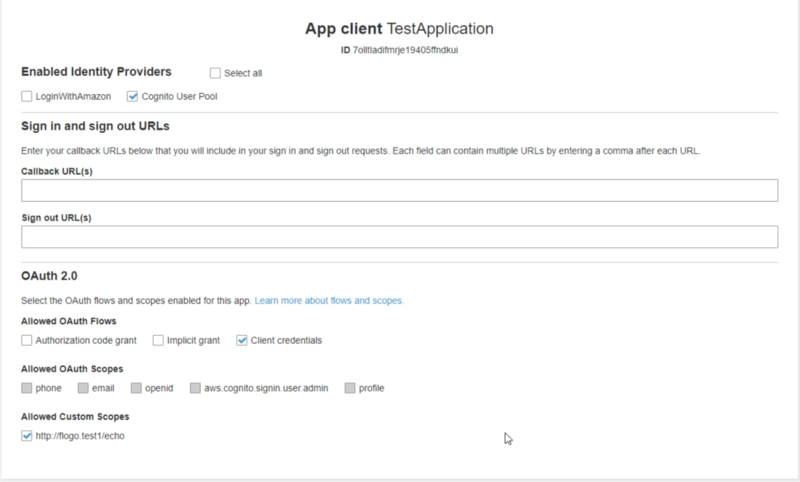
And that’s all the configuration needed at the Cognito level, and now let’s go back to Flogo Enterprise Web UI.
Flogo Set-up
Now, we are going to create a REST Service and we’re going to skip all steps regarding how to create a REST service using Flogo but you can take a look at the detailed steps in the flow below:

We’re going to create an echo service hosted at localhost:9999/hello/ that received a path parameter after the hello that is the name we’d like to greet, and we’re going to establish the following restrictions:
- We’re going to check the presence of a JWT Token
- We’re going to validate the JWT Token
- We’re going to check that the JWT included the http://flogo.test1/echo
In case, everything is OK, we’re going to execute the service, in case some prerequisite is not meet we’re going to return a 401 Unauthorized error.
We’re going to create two flows:
- Main flow that is going to have the REST Service
- Subflow to do all the validations regarding JWT.
MainFlow is quite straightforward is going to receive the request, execute the subflow and depending on their output is going to execute the service or not:
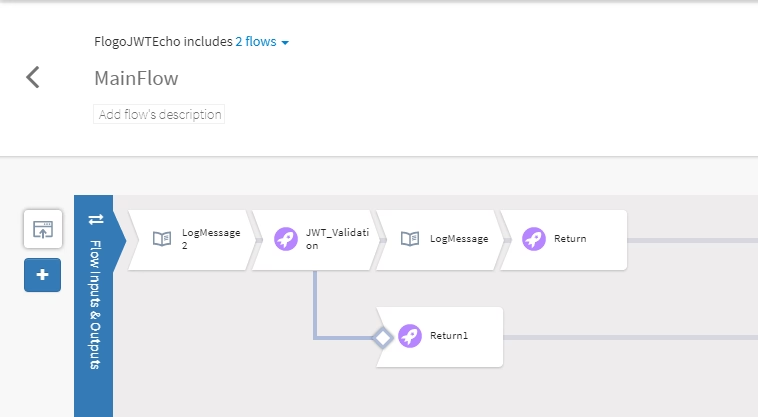
So, all important logic is inside the other flow that is going to do all the JWT Validation, and its structure is the one showed below:
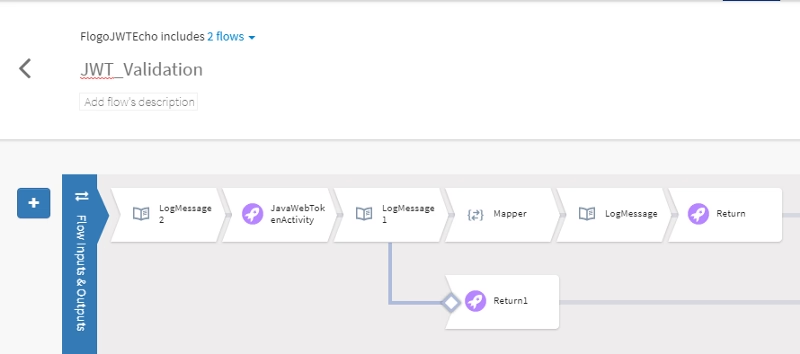
We’re going to use the JWT activity hosted in GitHub available at the link shown below:
NOTE: If you don’t remember how to install a Flogo Enterprise extension take a look at the link below:

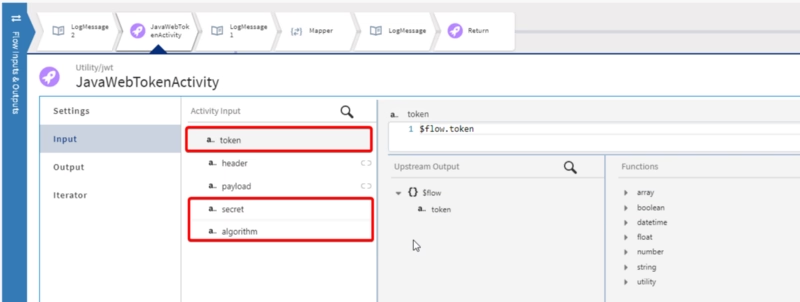
And after that, the configuration is quite easy, as the activity allows you to choose the action you want to do with the token. In our case, “Verify” and we provided the token, the algorithm (in our case “RS256”) and the public key we’re going to use for validating the signature of the token:

Test
Now, we’re going to launch the Flogo Enterprise Application from the binary generated:
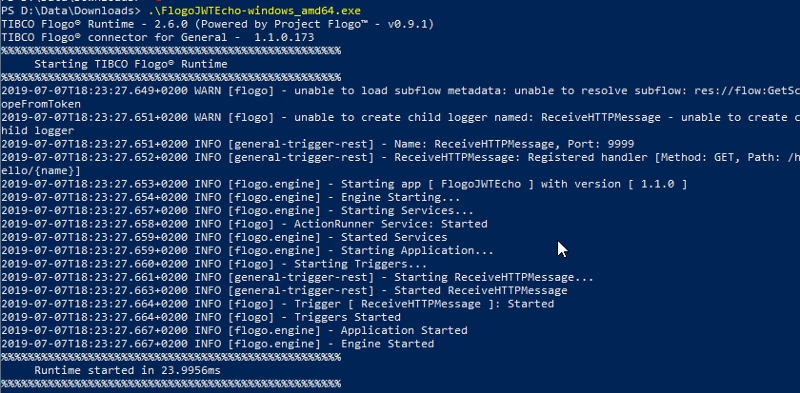
And now, if we try to do an execution to the endpoint without providing any token we get the expected 401 code response

So, to get the access token first thing we need to do is to send a request to AWS Cognito endpoint (https://flogotest.auth.eu-west-2.amazoncognito.com/oauth2/token) using our app credentials:
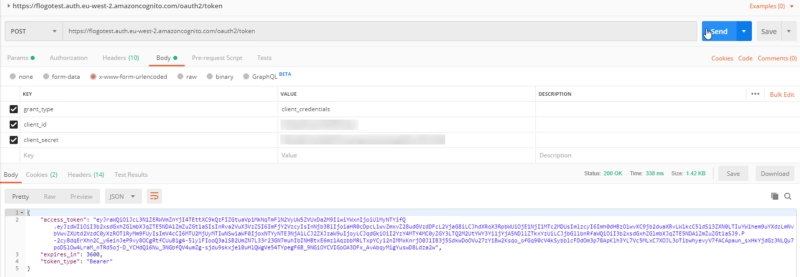
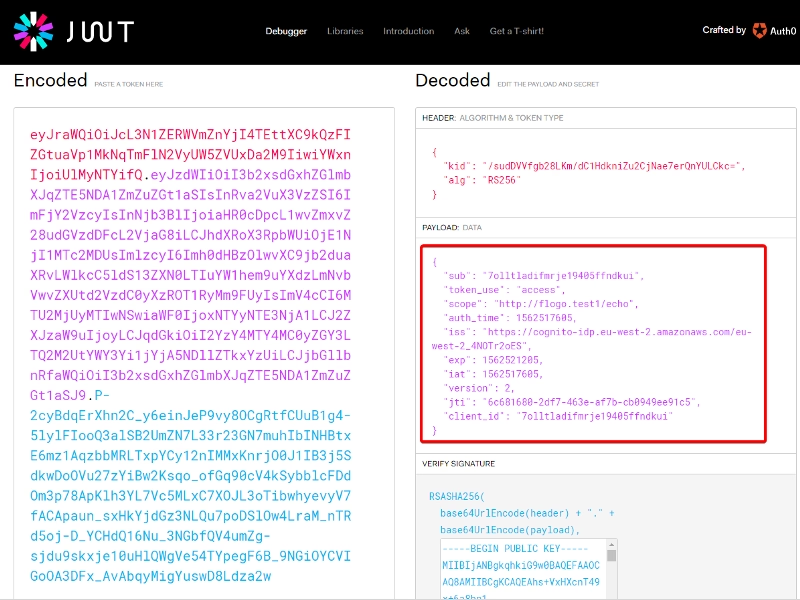
And this token has all the info from the client and its permission, you can check it in the jwt.io webpage:
And to finally test it, we only need to add it to the first request we tried as we can see in the picture below:


